Plumbers install and repair piping that delivers water, sewage, and other materials to and from homes and businesses. They interpret blueprints and building codes and use various tools to troubleshoot problems like leaks and clogs.
To be successful in this career, you need technical knowledge, practical skills, and physical strength. Critical thinking and customer service skills are also important. For more information, Click Here to proceed.
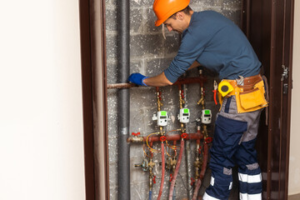
Home plumbing systems encompass various components, from the water supply and drain pipes to the toilets and sinks. Residential plumbers are trained to troubleshoot and repair all these systems, including gas lines. They are also skilled at installing new plumbing fixtures and appliances. This includes replacing outdated or damaged fixtures like shower heads and faucets. The most common problem that homeowners encounter with their plumbing is leaks. When these leaks are not repaired promptly, they can cause serious damage to the home’s structure and lead to flooding.
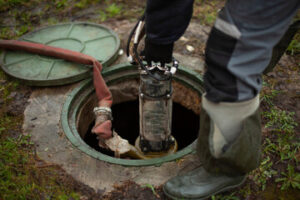
Another common issue is clogged toilets. While these are typically easy to fix, they can be a major nuisance for homeowners and may require the services of a professional. Other frequent issues include sewer backups and faulty water heaters. A residential plumber can fix these problems quickly and effectively.
One of the most important things to remember when hiring a plumber is that they should have experience working with commercial and residential systems. This ensures they know the plumbing industry’s latest trends and techniques. Additionally, it helps them to understand how different systems work and what to look for when servicing them.
It is also essential to find a licensed plumber in your state. Licensing requirements vary by jurisdiction, but most states require plumbers to pass a written exam and have at least two years of on-the-job training. Some states even have apprenticeship programs that allow plumbers to learn their trade through hands-on experience.
To become a plumber, research apprenticeship opportunities in your area. For example, it offers several opportunities through its Associated Builders and Contractors Empire State Chapter. These programs provide hands-on training and the opportunity to learn from experienced plumbers.
While there are many similarities between residential and commercial plumbing, there are also some key differences. For one, commercial plumbing systems are generally more complex than residential ones. In addition, they are subject to greater usage, so they must be designed with durability in mind. This means using higher-grade pipe materials and having more durable fixtures. Also, plumbers working on commercial systems must be able to coordinate with building managers, project engineers, architects, and construction workers.
Unlike residential plumbers, commercial plumbers work on a wider variety of systems. This includes industrial plants, office buildings, retail spaces, hospitals, etc. They are also responsible for a higher volume of plumbing repairs and installations. As a result, their jobs are more hectic and require more planning. Typically, a commercial plumber will work on larger boilers, site sewer lines, and lift stations. They must also follow blueprint designs and are often required to have basic carpentry skills to access hard-to-reach places like behind walls.
Even a small leak can cause significant damage when working on a large system. This is why it’s important to have a professional commercial plumber handle any plumbing issues in your business. These professionals are well-trained in dealing with high-usage commercial systems and can identify and repair problems. In addition, they can help you avoid costly repairs by detecting issues early on.
Commercial plumbers must also keep up with strict health and safety regulations. This means they must inspect and maintain plumbing systems in high-risk establishments like restaurants, hospitals, and government facilities. They are also required to test water for toxicity and other parameters regularly. These services can be difficult and time-consuming but are essential for maintaining a safe environment.
Due to the complexity of commercial plumbing, it is not uncommon for these professionals to charge more than their residential counterparts. This is because they must have the proper equipment and tools to complete their jobs and the necessary experience and knowledge. However, finding a reputable plumber who will provide quality work at an affordable price is crucial.
One way to ensure this is by hiring a plumber who offers upfront pricing. This will allow you to understand the full cost of the service before it begins, so there are no surprises down the road. In addition, make sure the quote you receive includes labor and materials. This will prevent you from being overcharged for parts or services you have yet to receive.
In the same way that residential plumbers allow individuals to go about their daily lives without worrying about their toilets or sinks, industrial plumbing professionals properly maintain large facilities like hospitals, shopping malls, and office buildings. These massive spaces require a lot of water and waste management, and they also have stringent codes and regulations to follow regarding the plumbing system. This is where an experienced industrial plumber can make a difference.
Many more people use plumbing systems in a commercial space than in a single-family home. This means there is a higher risk of problems, such as leaks, clogged drains, and inefficient water heaters. If these issues are not dealt with promptly, they can lead to expensive repair bills and significant operational disruptions. It is important that an experienced industrial plumber can identify and resolve these issues quickly to minimize damage and downtime.
One of the key differences between commercial and residential plumbing is that industrial spaces have much larger pipes. This means that there is a greater potential for damage, and it is important that an industrial plumber has the right tools and equipment to deal with these issues effectively. In addition, industrial plumbers must be able to work under pressure and in tight spaces. Industrial spaces often operate on a deadline, and downtime can cost the business money.
Leaky taps and inefficient water heaters may not be a big deal in a single-family home, but they can cause major damage when it happens in an office building or shopping mall. Industrial plumbers need to have a wide range of skills to work in these types of spaces, and they must also understand the specific requirements that come with these environments.
Whether it’s fixing a leaking pipe or installing a new water heater, plumbers are critical to the smooth operation of any facility. However, most people only think of residential plumbers when they need help with their plumbing systems. There are a lot of different kinds of plumbing jobs, some of which are very dangerous. Some of them are even unknown to the general public.
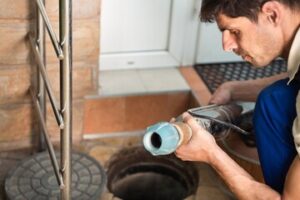
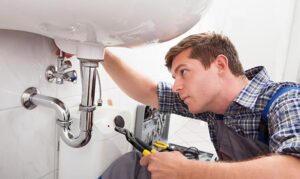
One of the most important plumbing skills is identifying problems and finding solutions. This requires attention to detail and a strong understanding of water and waste flow. It also involves testing pipes for leaks, locating blockages, and repairing or replacing fixtures like sinks, faucets, and toilets. Plumbers must also be familiar with local codes and regulations regarding home plumbing systems.
Another common service plumbers provide is installing new plumbing systems in homes and commercial properties. This includes piping, installing toilets and showers, and connecting appliances to water supply and drainage lines. It also involves reading blueprints and working with construction teams to ensure all plumbing meets building standards and requirements.
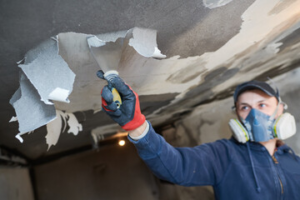
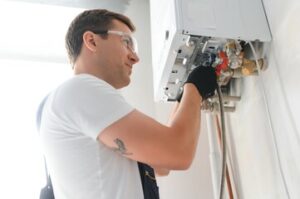
In addition to these general services, plumbers often repair or replace heating and cooling systems. This can include ductwork, water heaters, furnaces, and more. Depending on the job, this may require the plumber to remove existing equipment and then install the new system in its place or connect the old system to the new one.
Plumbers also help install gas lines for fireplaces, stoves, and outdoor grills. This type of plumbing is becoming increasingly popular as more and more homes are being built with natural gas instead of traditional electrical heating sources. While this type of work tends to be less routine than other types of plumbing, it still requires much skill and knowledge to do correctly.
Because plumbers often interact directly with customers, they must have excellent customer service skills. This includes communicating clearly and concisely, listening to their needs and concerns, and answering any questions. It also involves providing accurate estimates for work and promptly following up on all appointments.
While many plumbers work for large companies, some choose to go into business for themselves and operate their plumbing businesses. This can be a great option for those who want to control their work schedules and decide which projects they take on. It can also be a good way to get experience and training in the field before applying for a job with a larger company.